To create a business trip request, click the CREATE DOCUMENT button in MY DOCUMENTS section, located in user Dashboard, and choose BUSINESS TRIP REQUEST

or CREATE DOCUMENT button on the left side of the top bar and select the appropriate type of business trip.

NOTE: If the user does not have access rights to select a specific type of business trip, the list will not expand, but the request form will open immediately after clicking on the button.
In the selection list, select domestic or foreign trip.

Fill in the start and end dates and times first,

and the purpose of the trip, which you can type in or select from a list.

If you select a purpose that requires additional description, then a field will appear that needs to be completed.

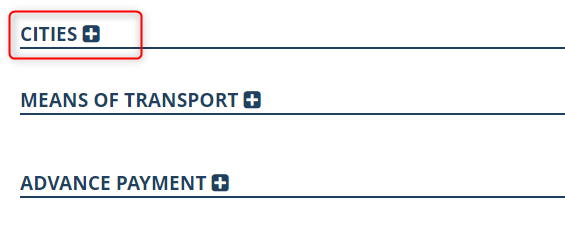
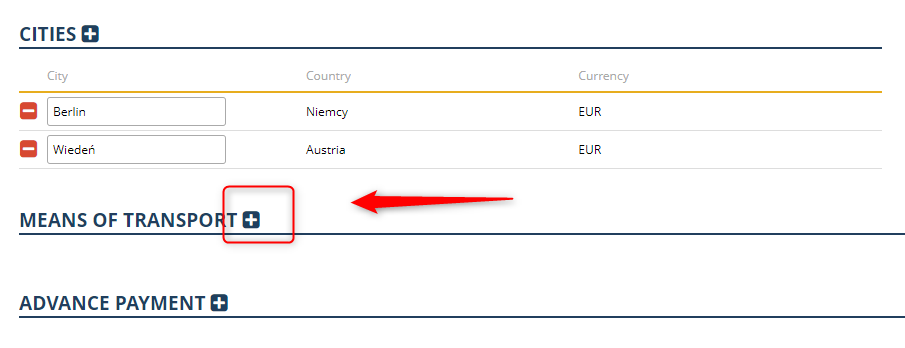
Cities and currencies
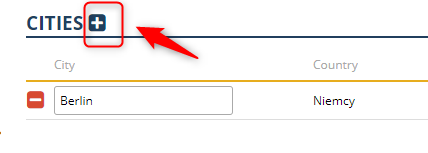
In the next step, select a city by clicking the + button.
This will display a list in which, first of all, you should select a country.

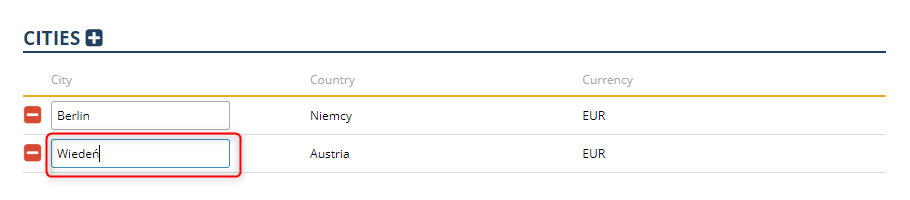
and enter the city. The currency will be set automatically.

In the case of a domestic business trip, the list of countries will not appear, you will be able to enter the city right away.
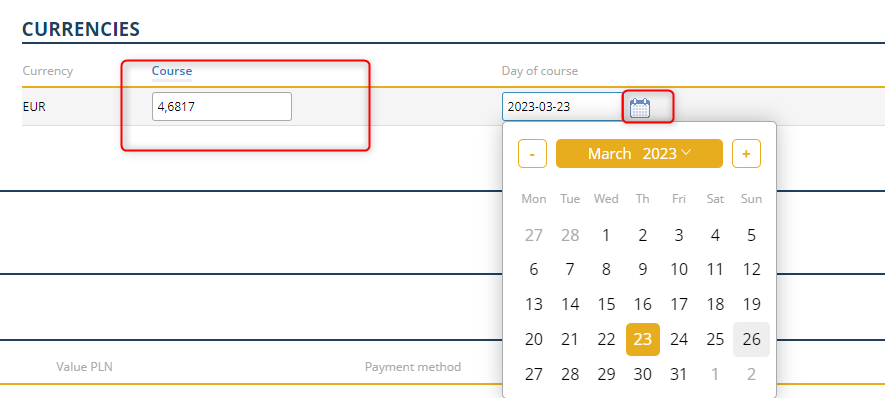
In the CURRENCY section, click the calendar icon and select the day of the exchange rate, which will automatically appear in the CURRENCY window (it is taken from national bank data).
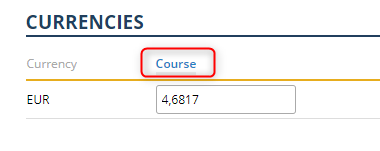
Clicking on the COURSE button will display a list where you can:
refresh the exchange rate according to the selected date,
refresh the exchange rate by the current date
open the national bank exchange rate page.
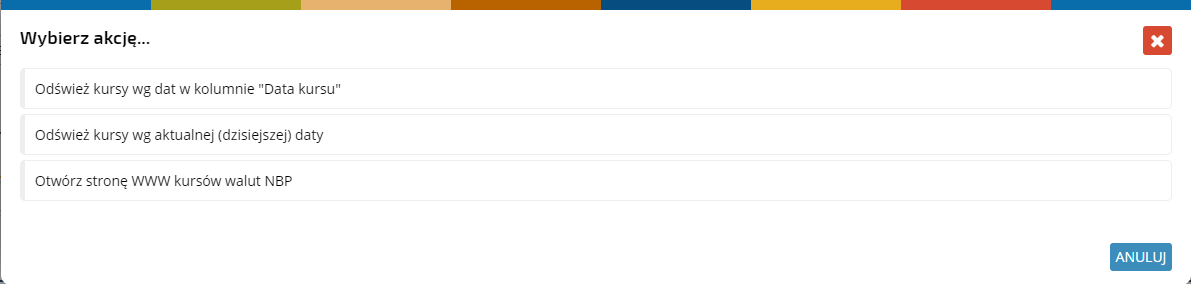
NOTE: It is not possible to select a rate with a future date, as the currencies on the national bank’s website update each day around noon.
To add another city, click the + icon in the CITIES section.
Choose a country from the selection list
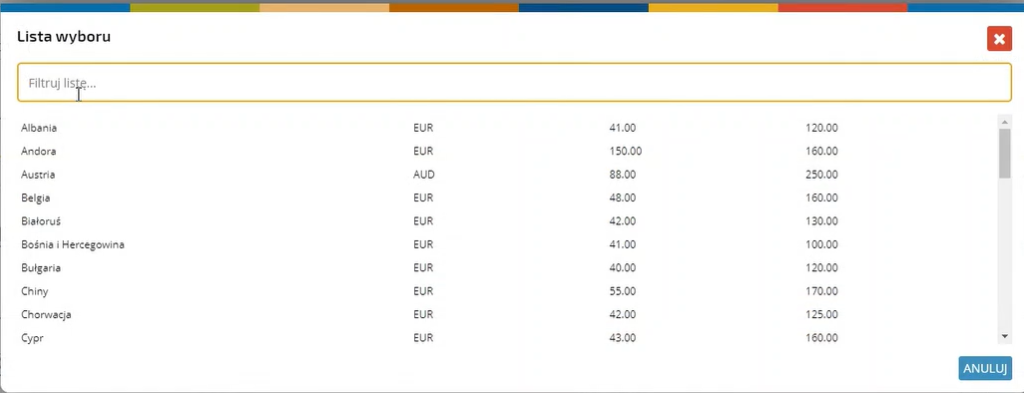
and enter the city.
Set the exchange date next.

Means of transport
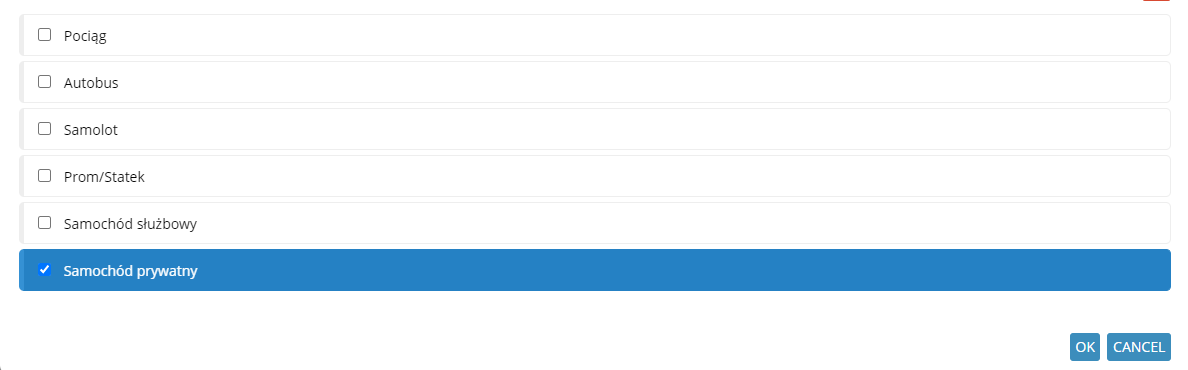
To select a means of transportation, click the + icon in the MEANS OF TRANSPORT section.
Select the appropriate item from the list and confirm with the OK button.
In the case of a company car, depending on the configuration, the following will be displayed:
a) a list of available actions
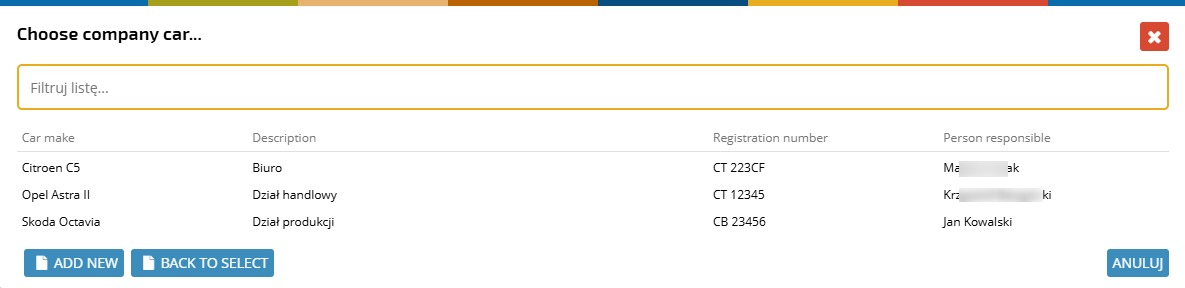
You can select a vehicle from the available ones by clicking on SELECT FROM THE LIST OF AVAILABLE COMPANY CARS.
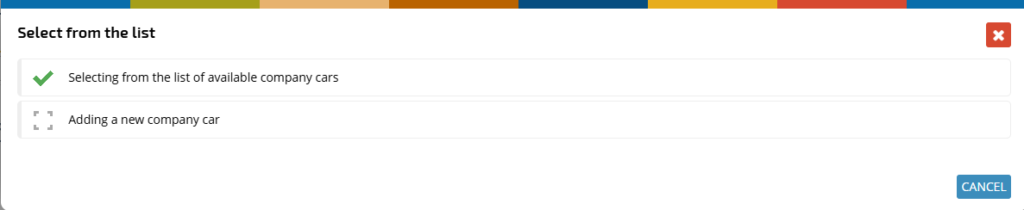
(Selecting this option will display a list)
or ADDING A NEW COMPANY CAR (one-time, without saving it to the list of available vehicles),
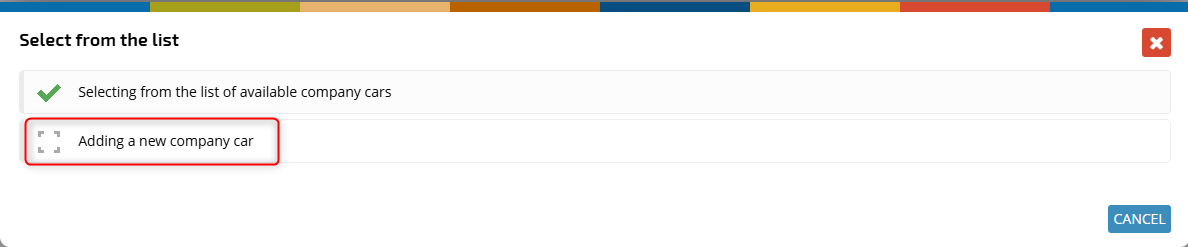
which will display a table where you need to fill in the vehicle details.

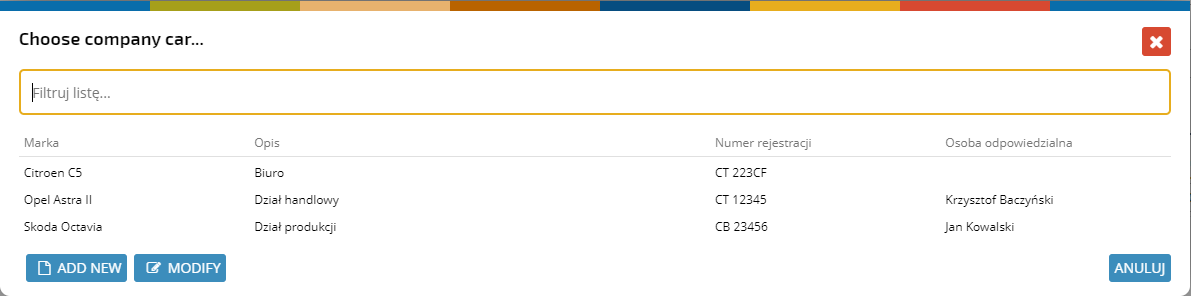
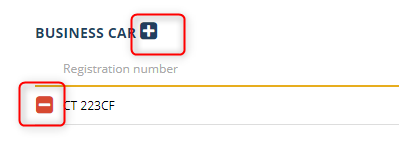
b) a list of available cars
Select the correct option from the list.

You can add or remove more cars by pressing + or – accordingly.
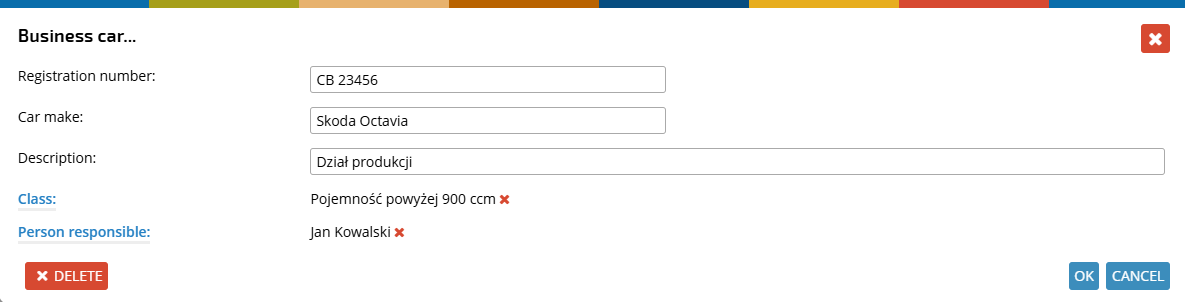
If your access rights allow it, you can add a company car to the list. Click ADD NEW
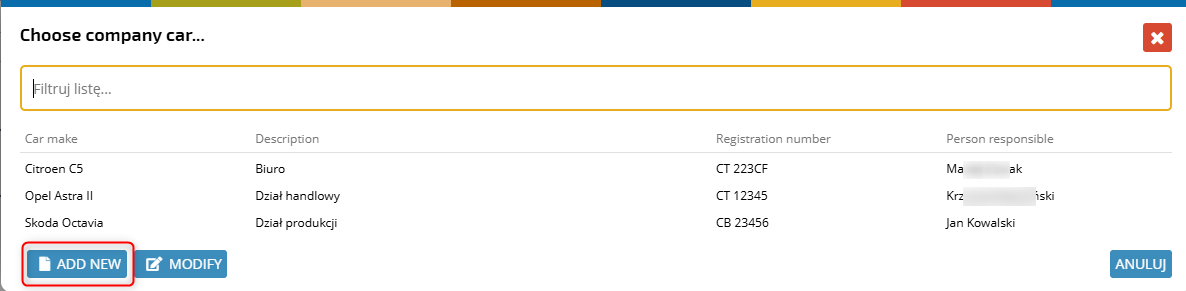
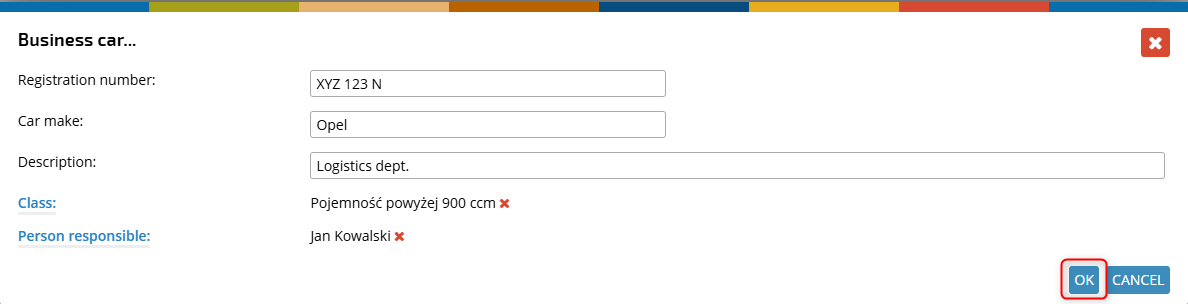
Fill in the registration number, car make, and description.

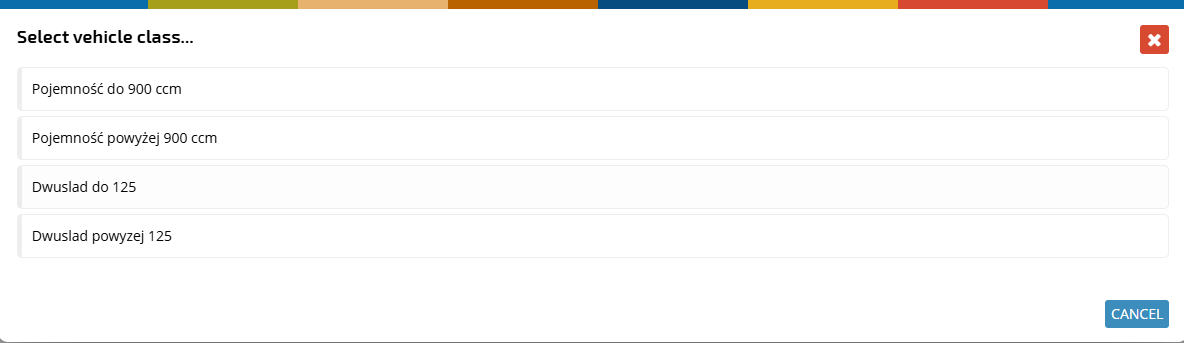
Click the CLASS link.

and select the correct one.
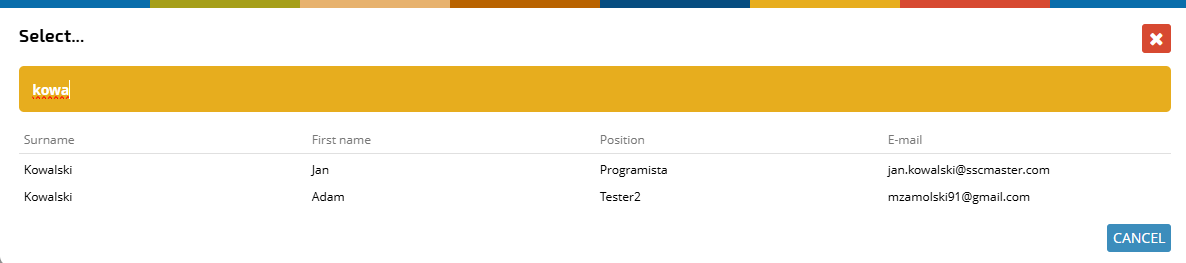
Click on PERSON RESPONSIBLE.

and select the correct person from the list.
Confirm the completed company car form by clicking the OK button.
If you want to edit the details of a car that is already on the list, click the MODIFY button.
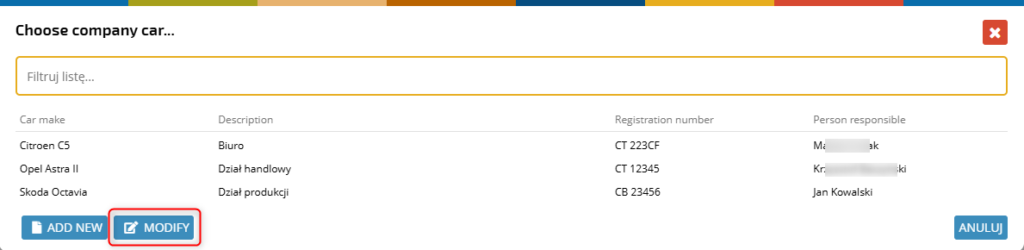
Select a car from the list
and make the necessary changes.
If you choose a private car, complete the details of the car.

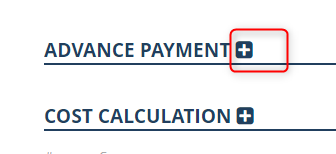
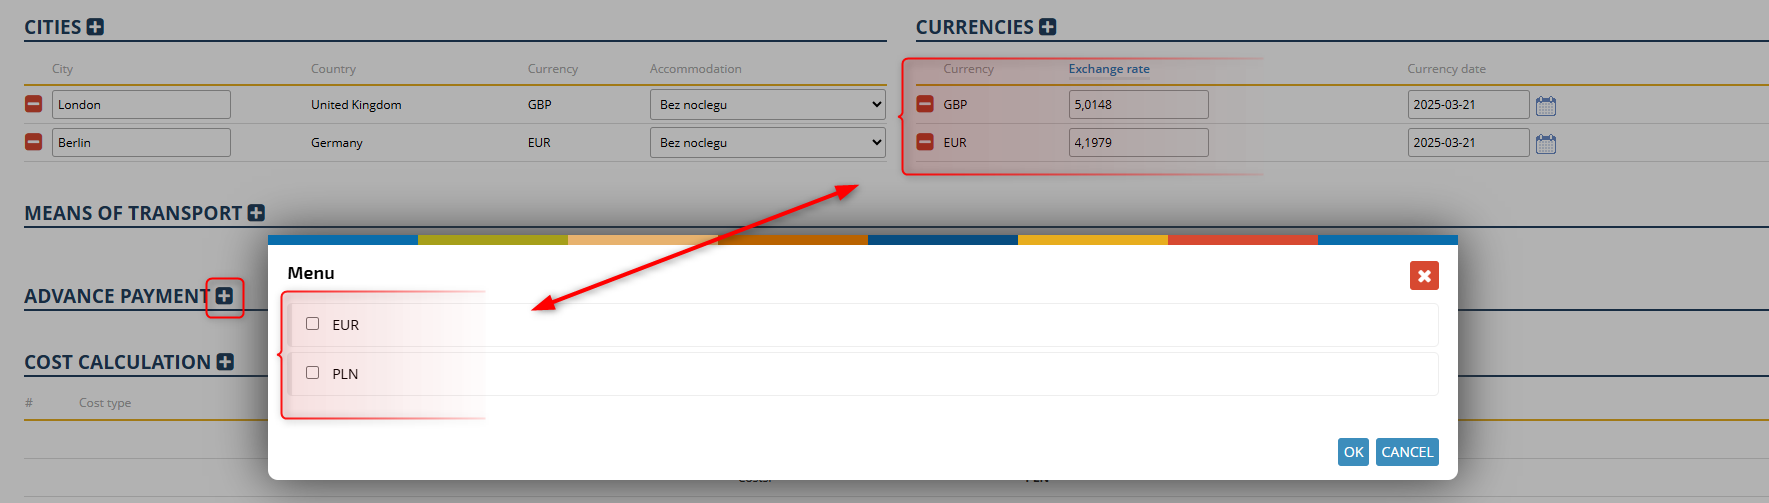
Advance payment
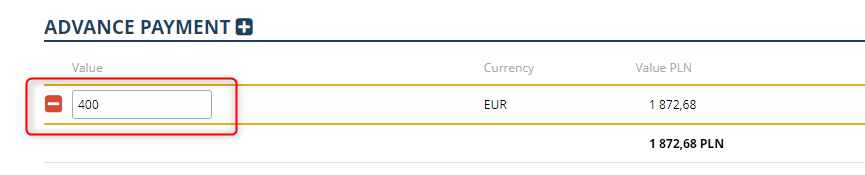
To add an advance payment, click + in the ADVANCE PAYMENT section,
Select the appropriate advance payment currency from the list and confirm with OK button.
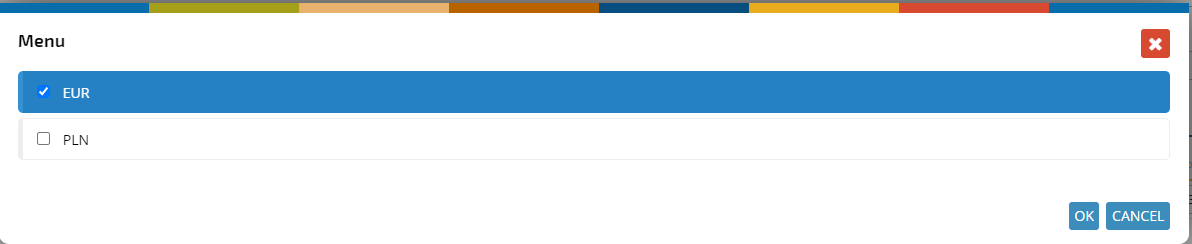
Note, the available currency types for advances may be limited in the configuration. In this case, as shown in the example below, the selected currencies in the application are GBP and EUR, but these may not be available when requesting an advance payment
Enter the advance payment amounts in the value column.
In the ADVANCED PAYMENT METHOD column, select the form in which you want to receive the advance payment.

Depending on the configuration, the selected payment methods may require specifying an account number. If the employee’s profile (ORG application) includes an account number, it will be automatically entered.

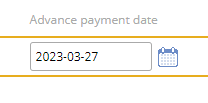
In the column ADVANCE PAYMENT DATE click on the calendar icon and select the date by which you should receive the advance payment.
Note: the selected method of payment will affect the method of settlement of the advance.
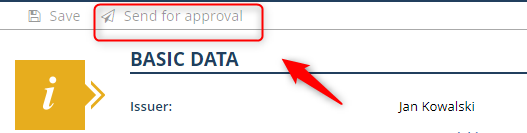
Send the finished request for approval.