Cyclical data export are a functionality created for managers and HR employees who need automatically created cyclical reports with data on employee groups. Depending on the settings, they can be generated every day, once a week, on specific days of the week, specific dates, etc.
To run a cyclical report, first you need to create its template. Open SSC LABOR application and then: TOOLS -> CYCLICAL DATA EXPORT -> TEMPLATES. Click CREATE DOCUMENT.
This will launch a new document view with two tabs:
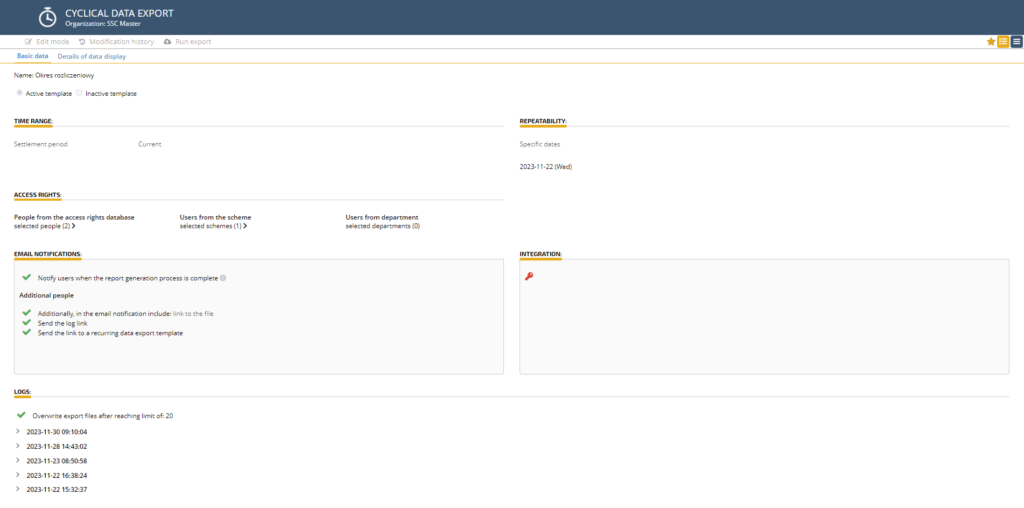
BASIC DATA – This tab contains configuration options according to which the report is generated and exported.
DETAILS OF DATA DISPLAY – configuration options according to which data in the report are generated.

BASIC DATA
Start creating a new template by giving it a title. It is best to include information on the content of the report and the frequency of its creation.
NOTE: The report will only be generated when the ACTIVE TEMPLATE option is selected.
In the TIME RANGE section, set the period the report should cover.

Data range – report data covers the range defined by the start and end dates

From date to today – the report data concerns the range specified by the starting date and the current day

From beginning of the year to today – report data covers the range from the beginning of the year to the current day

Number of periods back – data regarding the range defined by the number of specified ranges back. To include the current period in the calculations, select INCLUDE THE CURRENT.

Selected month – data range from the selected month

Selected quarter – range of data from the selected quarter

Half-year – range of data from the selected half-year

All year – data range from the selected year

Billing period – scope of data from the indicated settlement period

REPEATABILITY
Set how often the report should be generated.

For the EVERY DAY option, the report will be generated every day, for the ONCE A WEEK option, select which day of the week the report should be generated, and for ONCE A MONTH, on which day of the month.
The SPECIFIC DATES option will allow you to choose which specific days of the year the report should be created. Add dates by selecting them in the field or remove unnecessary ones by clicking the cross.
In the ACCESS RIGHTS section, select: specific employees who will receive access to the report (they will receive an e-mail notification), or those assigned to an access rights scheme or to specific departments.

If you want specific people to receive notification about the completion of the report generation, select the NOTIFY USERS WHEN THE REPORT GENERATION PROCESS IS COMPLETE option. In addition to the users selected in the previous section, you can enter additional people who will receive the notification. Enter the e-mail address to which the notification should be sent. You can attach a link to download the report file to the content of the notification, or place the file as an attachment to the notification email.
After selecting the link to the file, you can decide whether it should be a link to the report (select the SEND THE LOG LINK option) or a link to the template, which contains all logs related to a given template (select the SEND THE LINK TO A RECURRING DATA EXPORT TEMPLATE).

If you decide to attach the file as an attachment to the notification, you can protect the it with a password.

Click CHANGE PASSWORD, enter the password in the displayed window and confirm. After entering the password, the report will be sent in the form of an encrypted ZIP file.

In the next step, define after what number of generated reports, new report logs should overwrite the existing ones. This option will make it easier to manage archived entries and delete those that are no longer needed.
DETAILS OF DATA DISPLAY
After configuring the basic settings, go to the DETAILS OF DATA DISPLAY tab.

In the first step, select the organization whose employees are to be covered by the report.
Then define the criteria for creating report data. You can choose:
by employee
all (belonging to the previously selected organization)

selected employees

Select the proper employees and confirm with the OK button.

by supervisor
The reports will concern employees whose direct supervisor is the selected person. If you indicate here, for example, John Smith, the report will include all employees who have John Smith as their manager.

As in the previous example, select the proper person from the list and confirm.

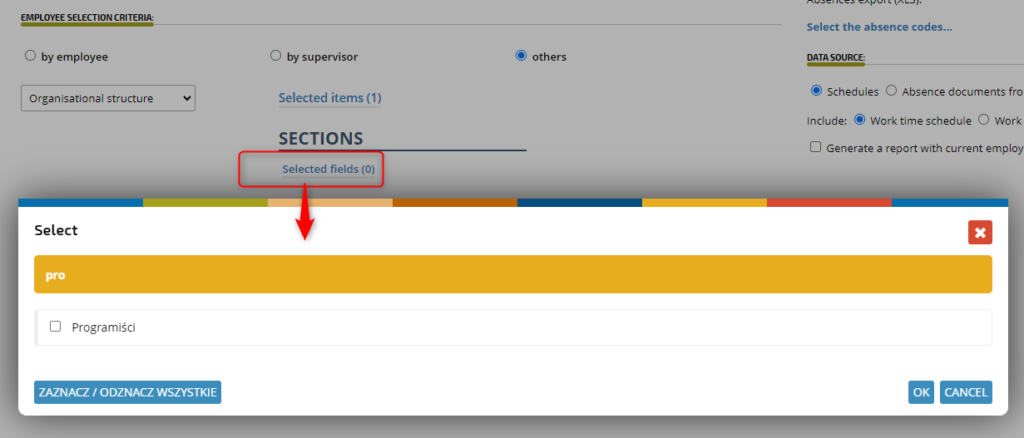
others

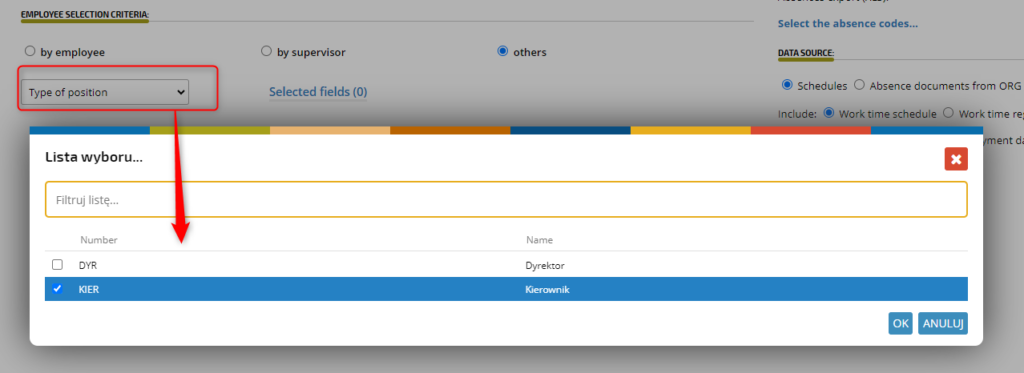
Type of position – select the type of position the report should cover
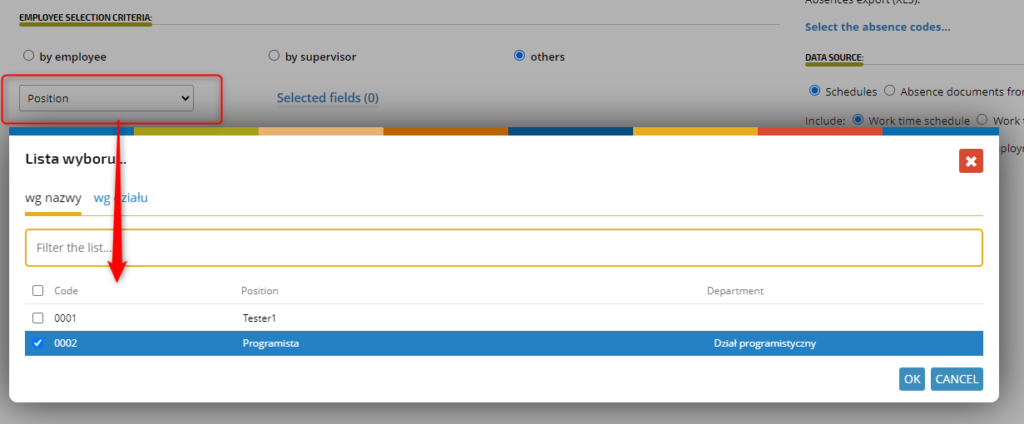
Position – indicate a specific position
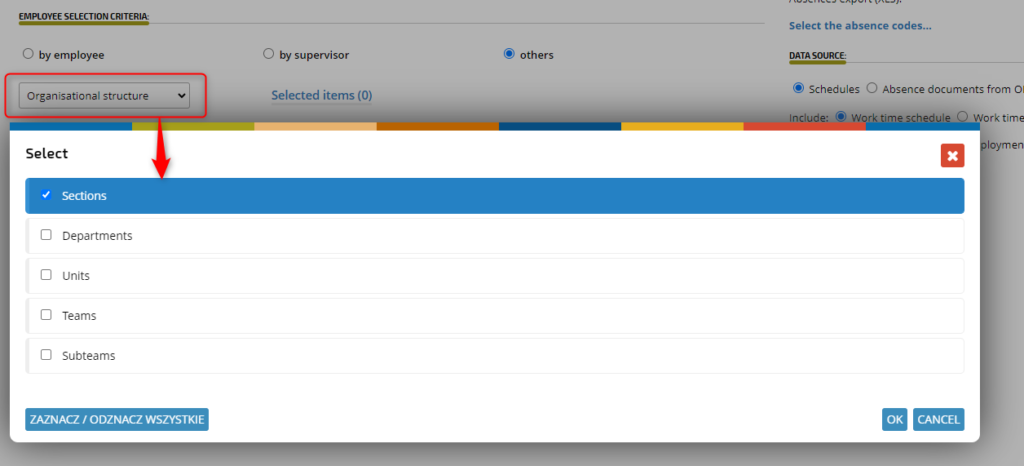
Organisational structure – indicate the elements of the organizational structure and then select which ones should be included in the report.
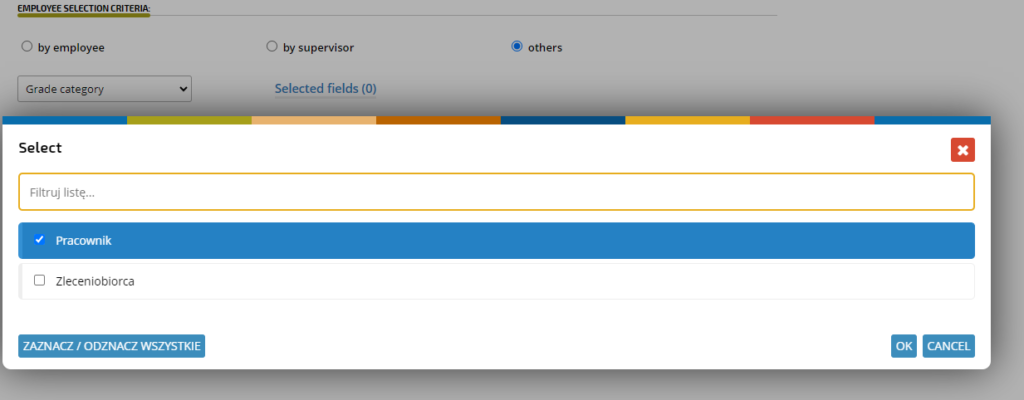
Grade category – select a grade category item
Complete the REPORTING CRITERIA and DATA SOURCE. You must indicate the specific type of report according to which the data should be exported. We have reports from the “Export XLS” group at our disposal. You can read more about report types in the article Exports to XLS.

ADDITIONAL PARAMETERS
To ensure that each selected employee receives a separate report regarding him or his subordinates’ data, check the box:

Then, in the DETAILS OF DATA DISPLAY tab, select whether the reports should concern the previously indicated persons or their subordinates.

Save completed report template. If you have chosen to receive a notification, you will receive it according to the configuration in the first tab.
Generated report files can be found in the logs.
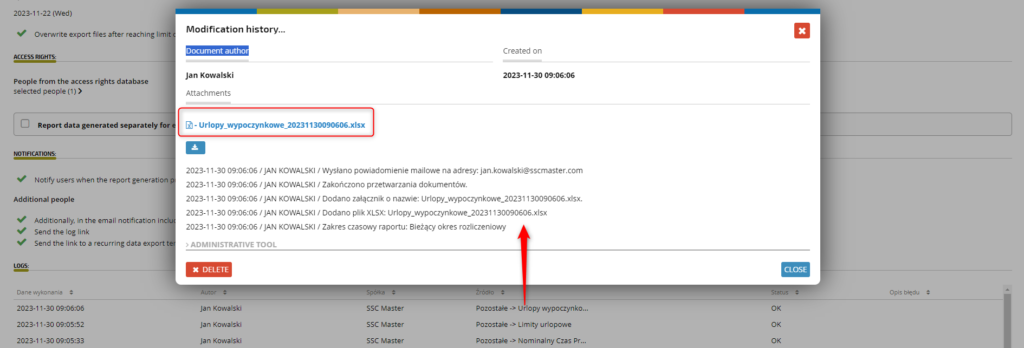
When the option to generate separate reports is selected, log documents and reports are generated separately for each specified user. Document names and log names contain the name and surname of the person for whom they were created in the title.

With the checked (mentioned earlier) option of sending the report as an email attachment,

Once the report is completed, file will be sent in a message.
If the link sending option is selected, the user will receive a message with the selected links.


