To create an employee secondment request, click the CREATE DOCUMENT button in the MY DOCUMENTS section of the Dashboard and select EMPLOYEE SECONDMENT from the list.
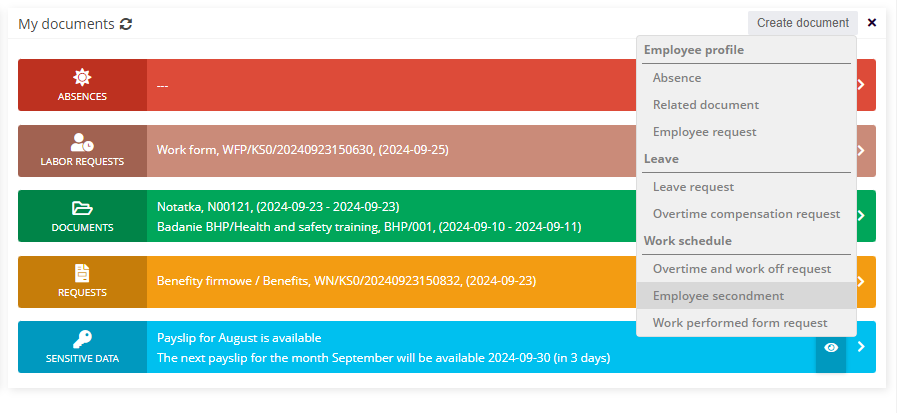
A new request document will open with a window for selecting people for secondment.
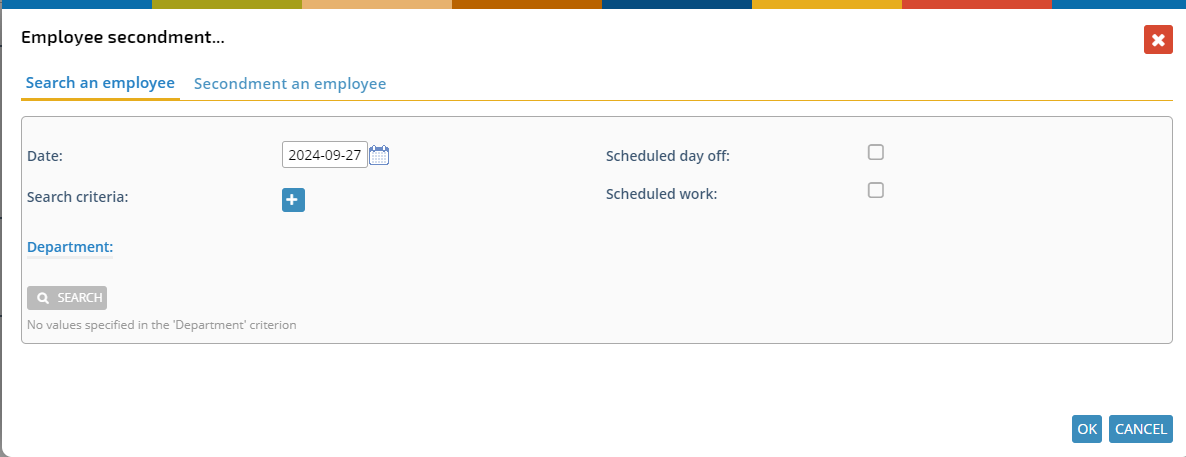
Search an employee
If you wish to request that an employee from another department/store be temporarily assigned to your department, select the SEARCH AN EMPLOYEE tab.

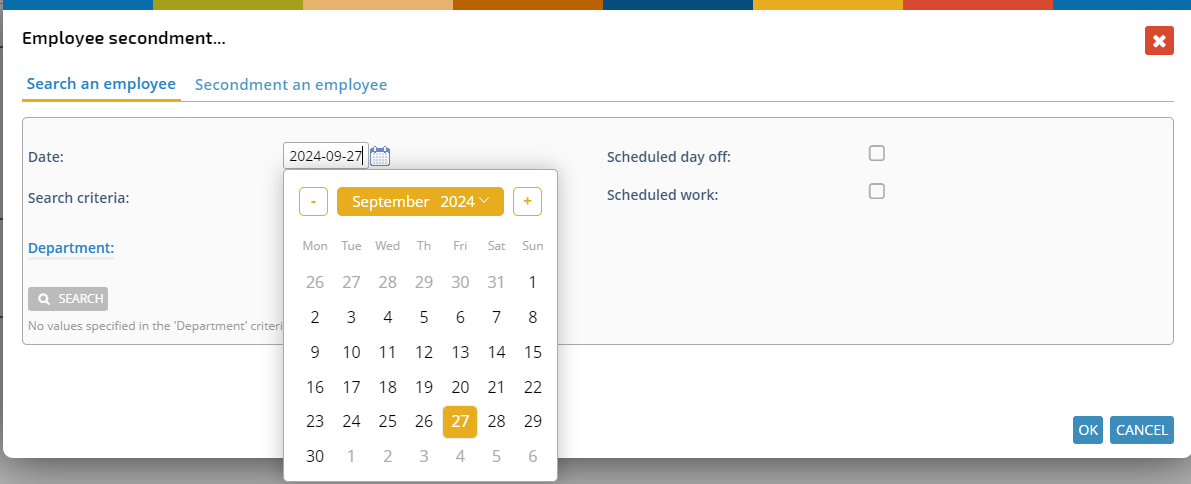
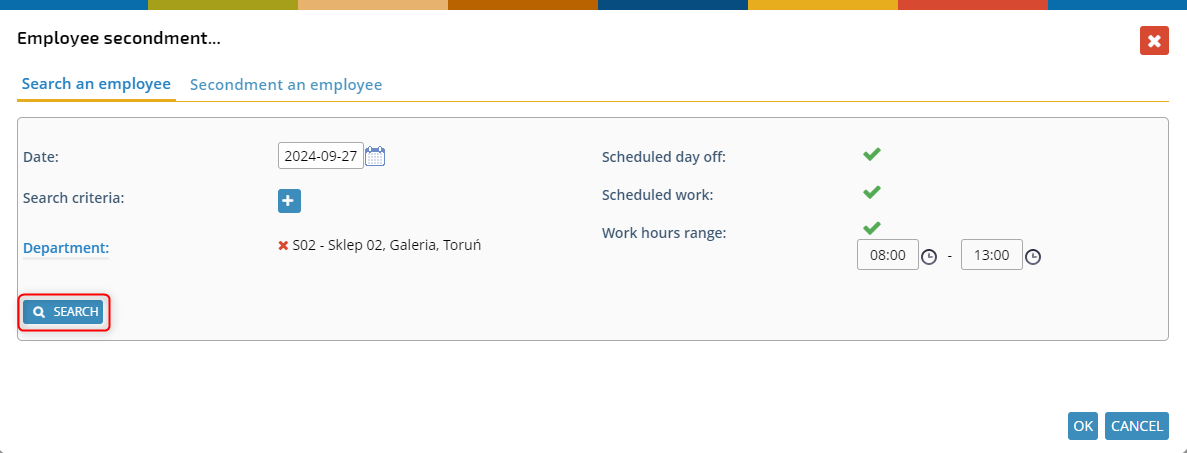
Indicate what day you need an employee.
If you need to find an employee who has a scheduled day off on a certain day, check the box:

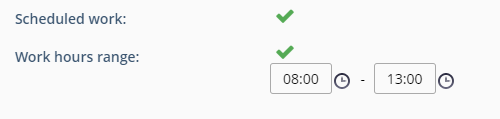
If you need an employee who is already scheduled to work on a particular day, mark:

You can specify at what times he should be scheduled to work.
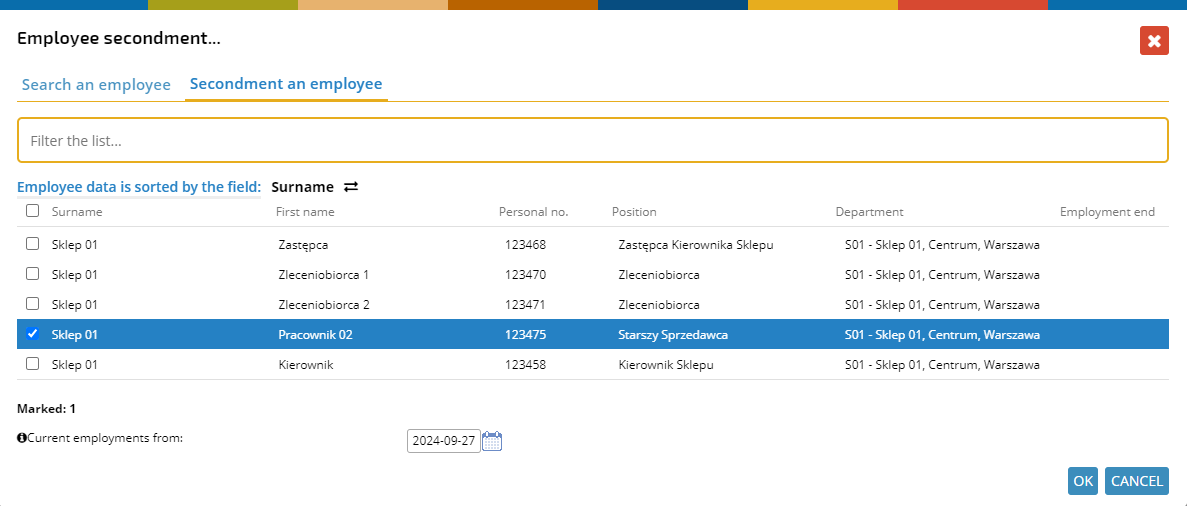
Select the search criteria for an employee, click the button.

Select criteria (there can be one, or more items).
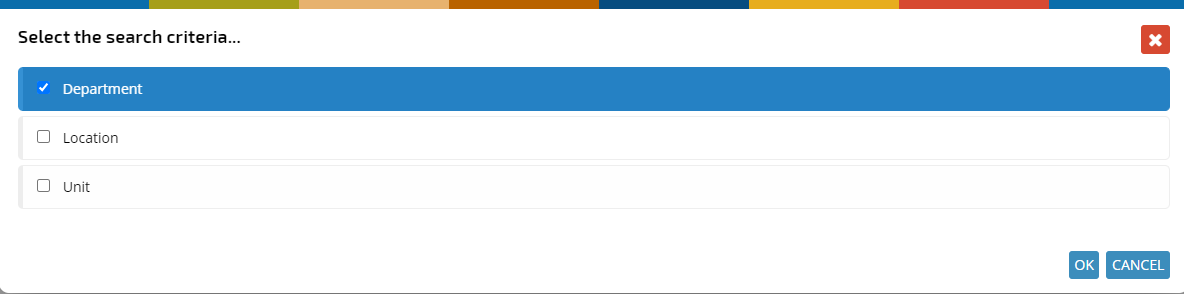
Pick out specific items.

When the employee search card is complete, click SEARCH.
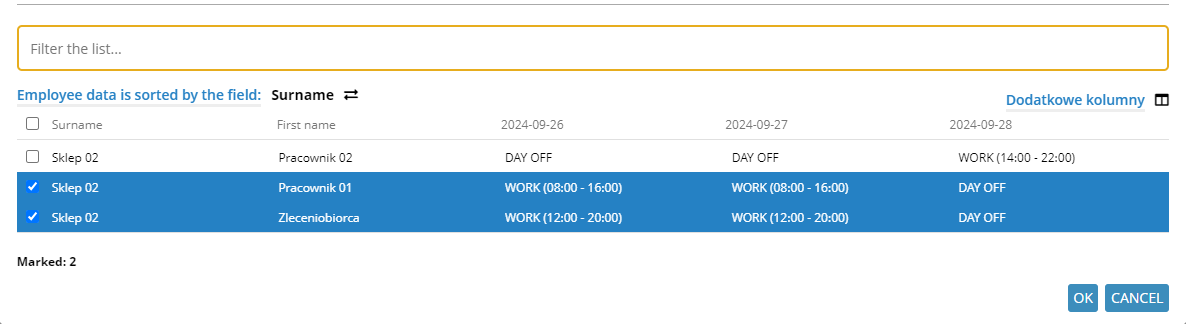
A list of employees who meet the criteria will be displayed, as well as a table with their working hours on the indicated day, day back and day forward. Select the right employee.
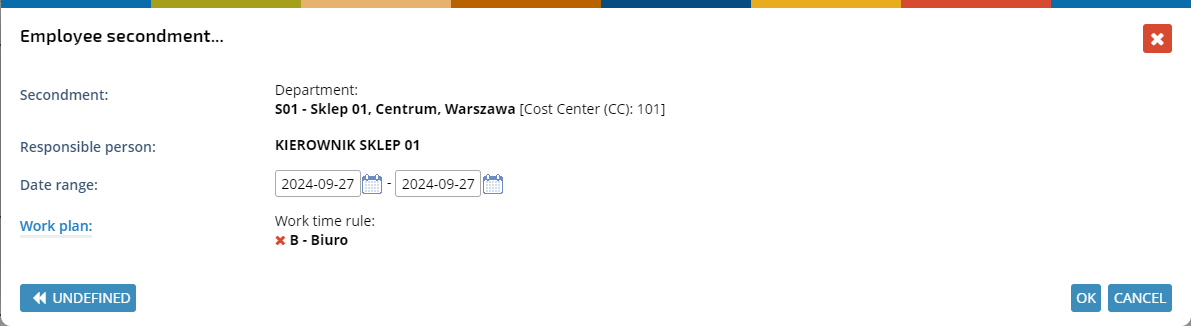
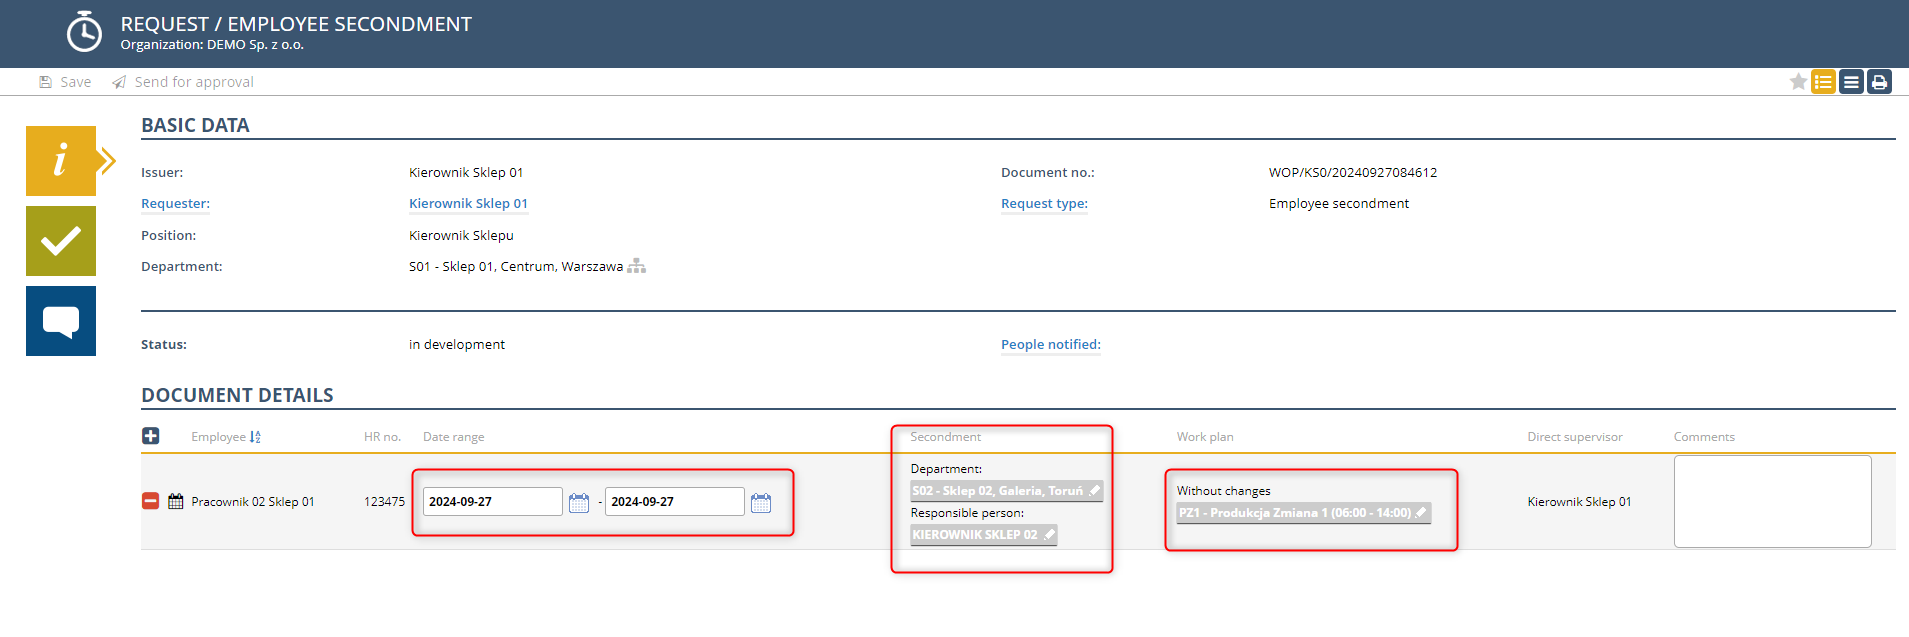
A window will be displayed with information about which department/store/team the employee will be seconded to, and who will be the responsible person. Select the date range of the employee’s secondment.
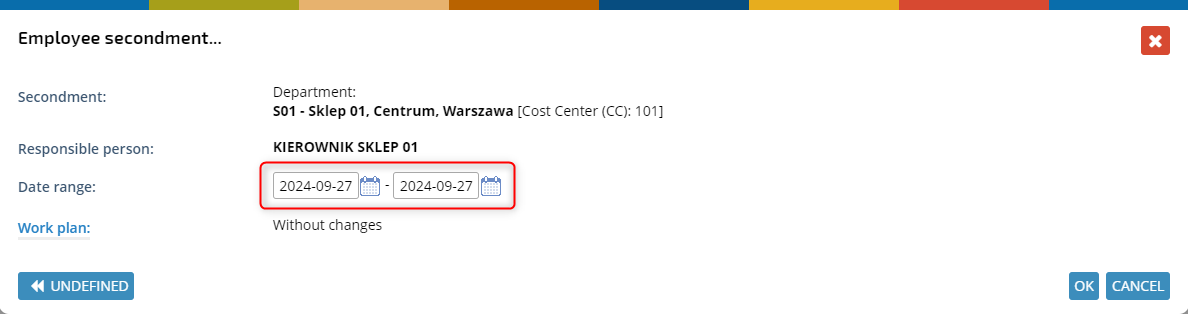
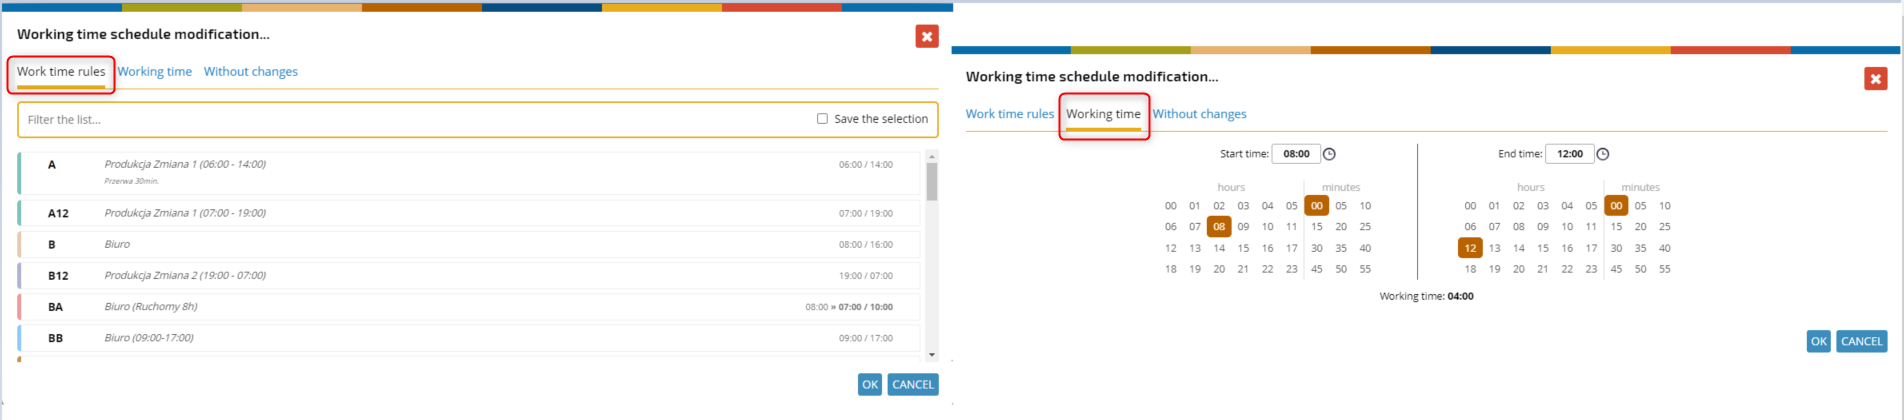
If you want to change an employee’s work schedule, click the WORK PLAN link.

You can assign a working time rule or specific hours.
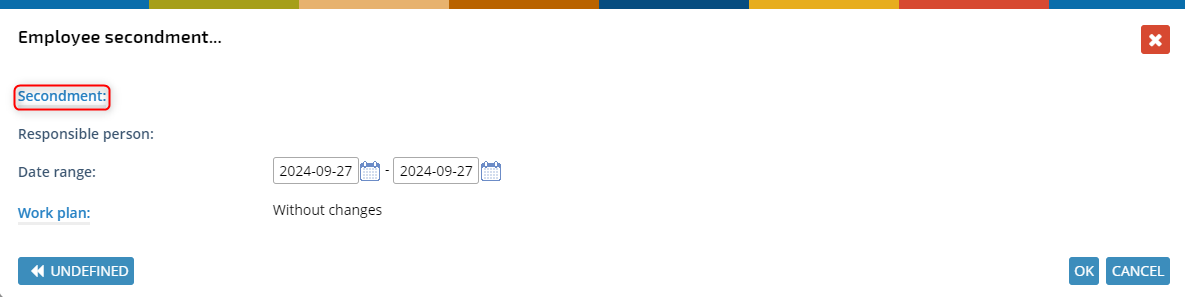
The WITHOUT CHANGES tab will withdraw previously made changes to the work plan.

Approve the completed secondment card.
Secondment an employee
If you want to send an employee assigned to your department/team, to help another department. Select the SECONDMENT EMPLOYEE tab.
In the next tab, click SECONDMENT,
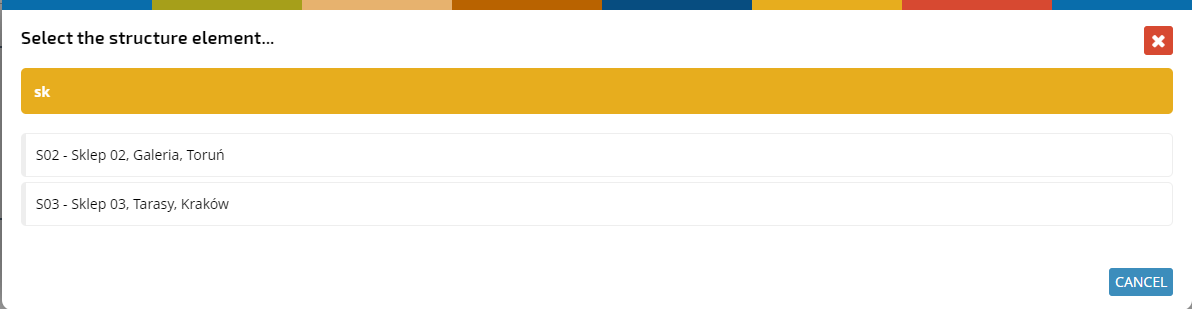
Select the department to which you want to assign the employee.
Enter the secondment date range and (if necessary) modify the work plan – the steps were described in the previous paragraph.

The entered data will be displayed in the details of the request document. In them you can modify the date, place of secondment and work schedule.
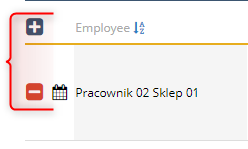
If you want to add a new person/row, click the “+” button and go through the previously described steps. To delete a line, click “-”.
Finished request send for approval.
