In the APPROVAL PATH tab, you can configure methods of approving documents.

To add a new path, click ADD APPROVAL PATH.

In the displayed list, choose whether you want to create an entirely new path, or create one based on an existing one
NEW APPROVAL PATH
Form parameters
In this section, you select which form you want the approval path to apply to. In the case of the ORG application, this is the request form.

You can specify for which requests the path should be displayed. By default, all are selected – if you want to change this, click TYPE,

Select the relevant items from the list and confirm with OK button.
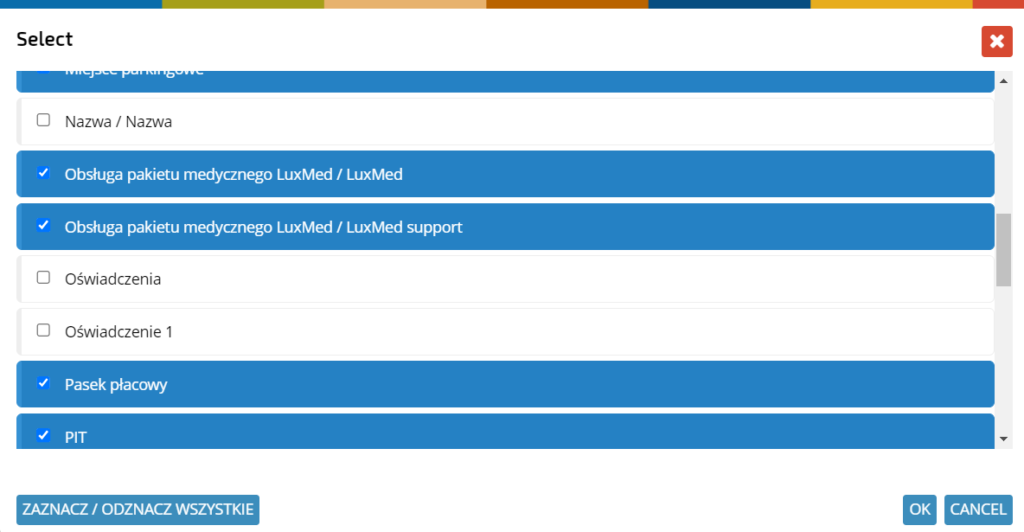
Ifyou want the path to apply only to employees assigned to a specific organizational structure element, check the box and click SELECTED ELEMENTS.

Indicate the relevant items and confirm with the OK button.
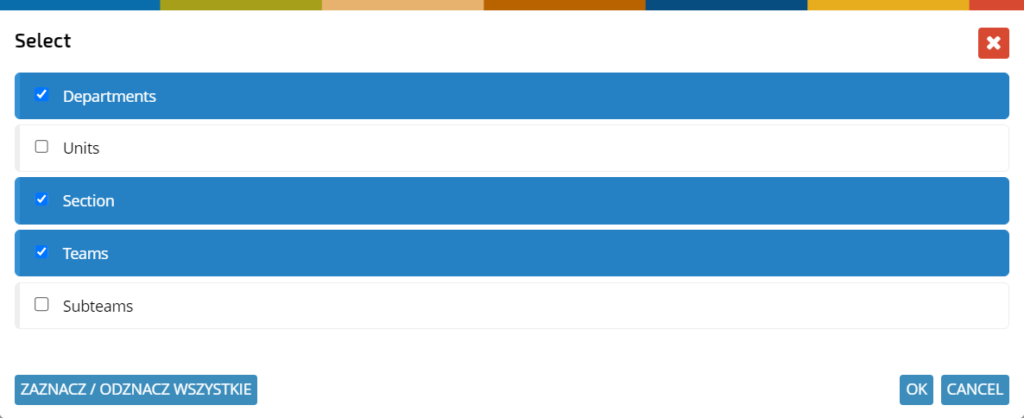
You can specify which specific elements of the structure (departments, divisions, etc.) are to be taken into consideration. Click SELECTED BOXES and indicate the selected items as in the previous step.

If a path is to apply only to people who meet each of the conditions indicated in the structure elements, check the box.
PATH PARAMETERS
In this section you can select the APPROVAL MODE:
SERIAL APPROVAL- the document must be approved in order, by the persons indicated in the path steps
PARALLEL APPROVAL- people from the given steps of the approval workflow can approve or reject a document independently of each other.

You can also run modes:
-adding information about people on the approval path to notifications;
-requiring comments upon approval;
-requiring confirmation of approval or rejection at each level;
-requiring a comment upon rejection.

APPROVAL LEVELS
This section allows to configure each step of the document approval workflow in detail. In the first step, select the number of approval levels.

You can enter your own name in the LEVEL NAME column.

In the column DATA SOURCE, you can open a list from which you can indicate the people listed at a given level of the approval workflow. With the setting of this column is related to what options will appear in the next column – DATA TYPE.
ACCESS RIGHTS
-ALL USERS – the ability to indicate on the path any user with an account.

-USERS FROM THE SCHEME – this option limits the selection of users to those assigned to the selected scheme
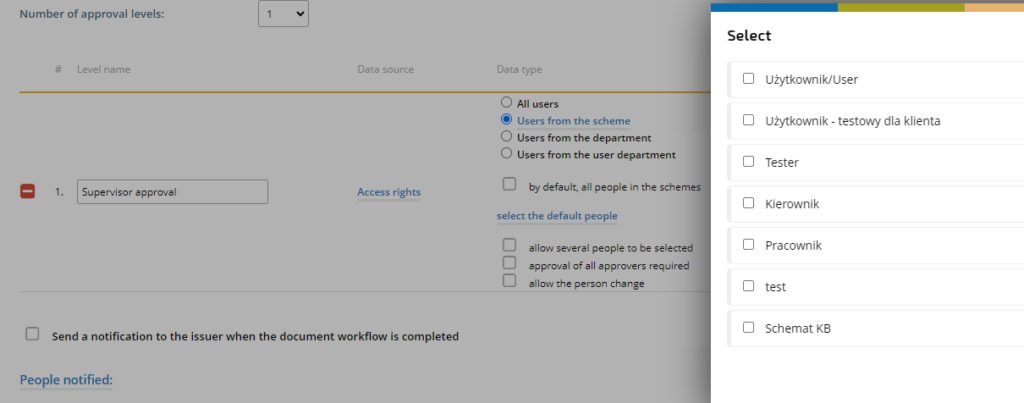
-USERS FROM THE DEPARTMENT – you set the ability to select users assigned to selected departments

-USERS FROM THE USER DEPARTMENT – this setting will allow you to select people from your department in the path.

You can indicate the persons implicitly assigned to a particular approval level. Click SELECT DEFAULT PERSONS,

Select the required persons in the list and confirm with OK button.

The configuration allows to set the possibility of selecting several people at a given level of approval, requirement of approval of all persons at approval level, and the possibility to change the person (to a different one than the one indicated by default).

CLOSED LIST – this option only allows you to indicate specific people.

ORGANIZATIONAL STRUCTURE – this setting automatically selects the requestor’s direct supervisor.

DIRECT SUPERVISOR – allows you to change the person on the path.

The selection of this person is set in the same way as the data source – ACCESS RIGHTS

The other columns will allow you to activate the option to send email notifications to people on the path and to people document issuers, to specify a level during approval and an additional action after document approval.

In this section you can also set for the document issuer to get an email notification when the approval workflow is completed, informed persons, and enable the option for informed persons not to get a notification when a new document is created.

FIELDS EDITING
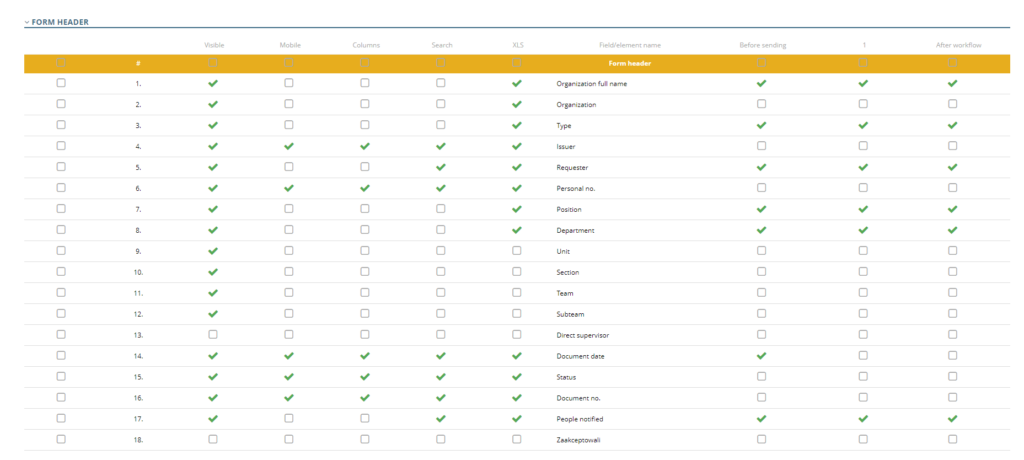
The section allows you to configure which document fields can be displayed and edited at a given approval level. This applies to the form subsections: FORM HEADER, FORM CONTENT, and ADDITIONAL FIELDS.

To configure, expand the subsection you are interested in by clicking on its name.
Each field is separately configurable. You can set visibility in the web and mobile application, column visibility, search, export to XLS, and the stages at which it is possible, starting with the pre-submission stage, moving through each approval stage, ending with the completed approval workflow. You run the options by clicking on the appropriate boxes.
REQUIRED FIELDS
This section allows you to set the fields that must be filled in before the document can be saved or sent for approval.
Select the relevant tab.

Then click on the FORM HEADER or FORM CONTENT.

Select the relevant items in the list and confirm with the OK button.
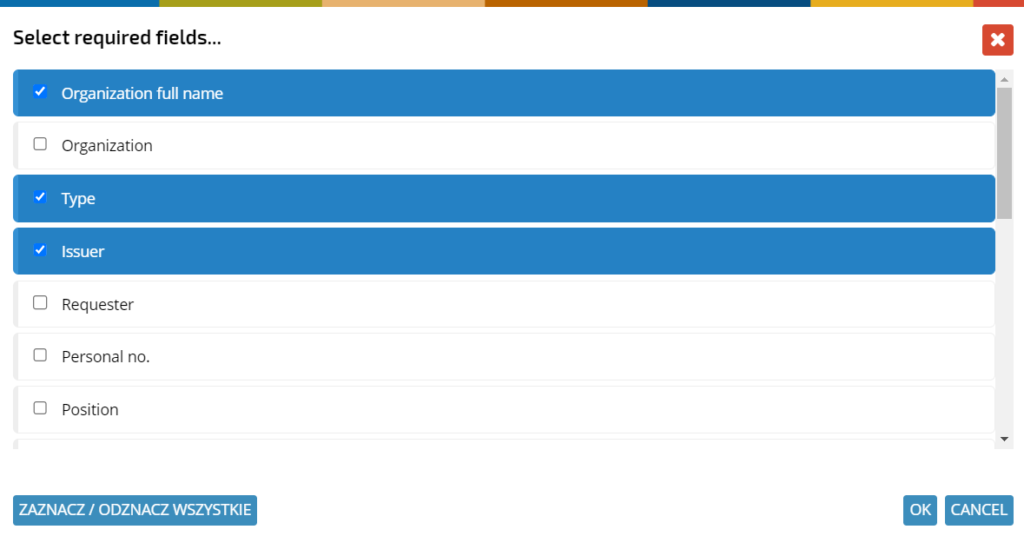
The selected fields will appear in the LIST OF REQUIRED FIELDS FOR A GIVEN EVENT column.
CREATING AN APPROVAL PATH BASED ON AN EXISTING ONE AND EDITING AN EXISTING PATH
If you want to create a new path similar to an existing one, click ADD APPROVAL PATH.

In the list, select BASED ON EXISTING APPROVAL PATH.

Select and click the relevant path.
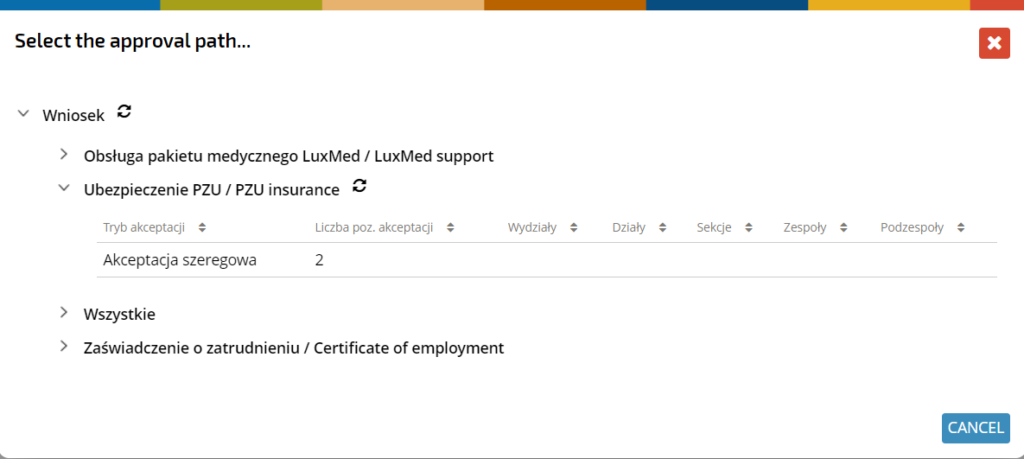
Make the necessary changes to the previously configured path (for a detailed description of the path elements, see the section on how to create a new path) and save them.
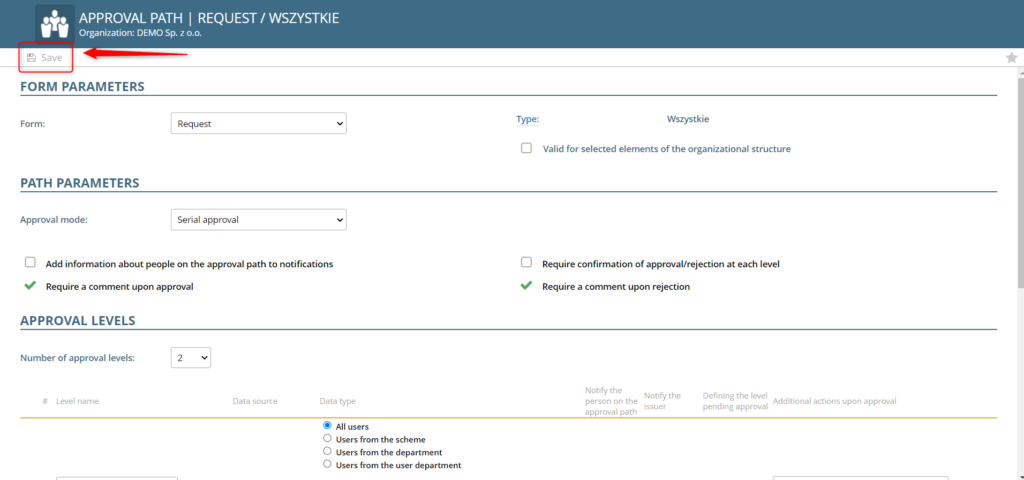
To edit an existing approval path, find its position in the tree and open it with a single click.

APPROVAL PATH ELEMENTS EXPORTED TO XLS
To set which items to include in the export to XLS, check or uncheck the relevant items in the VISIBLE column.

The selected items will be included in the export.
