After recording the actual working hours, depending on the permissions granted to the user, we can make modifications to the working time records. To do this, open the schedule of a given employee (by clicking on it directly on the view).

To modify the actual working time (shortening or extending the working time) in the edit mode, click on the stylus icon.
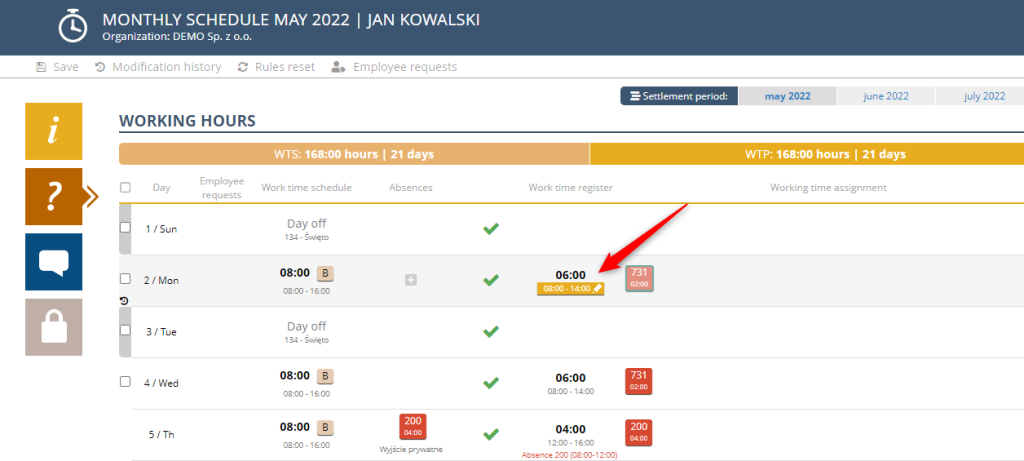
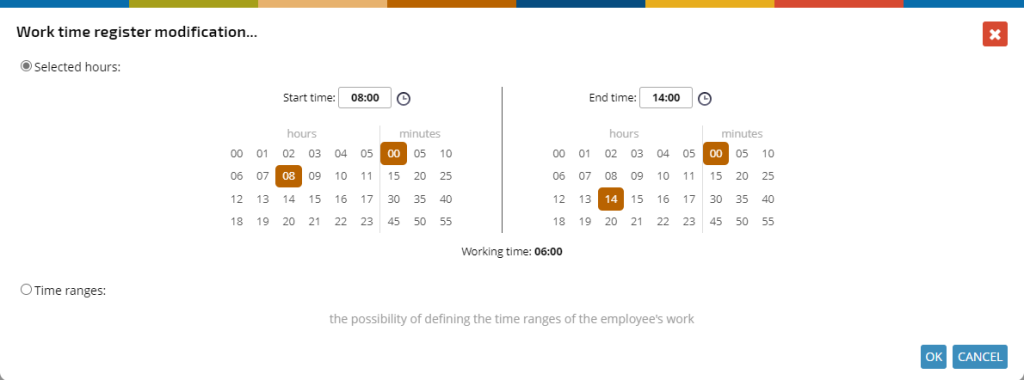
Then we indicate the correct working time hours.
In the event of overwork (extension of working time), the system will automatically calculate the overtime due or ask you to complete the document “Overtime work order”.
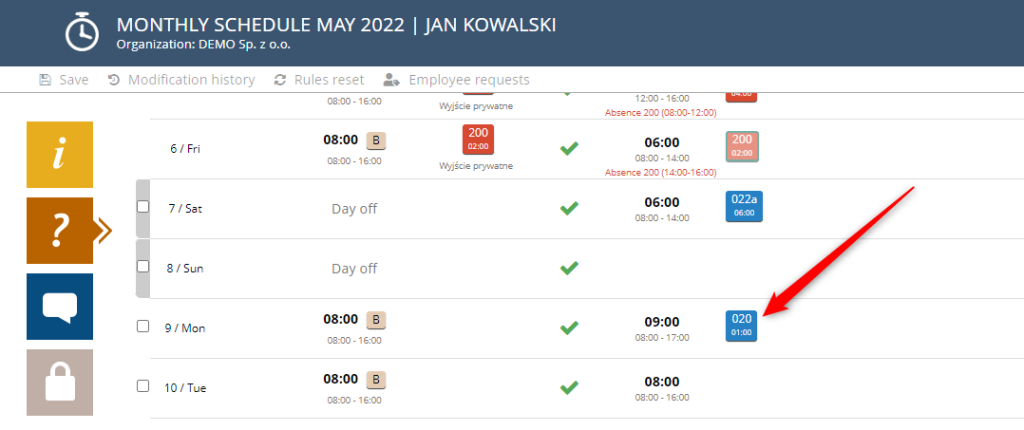
In the case of a reduction in working time, the system will automatically enter the default underdevelopment component, depending on the implementation, it may be another underdevelopment component.

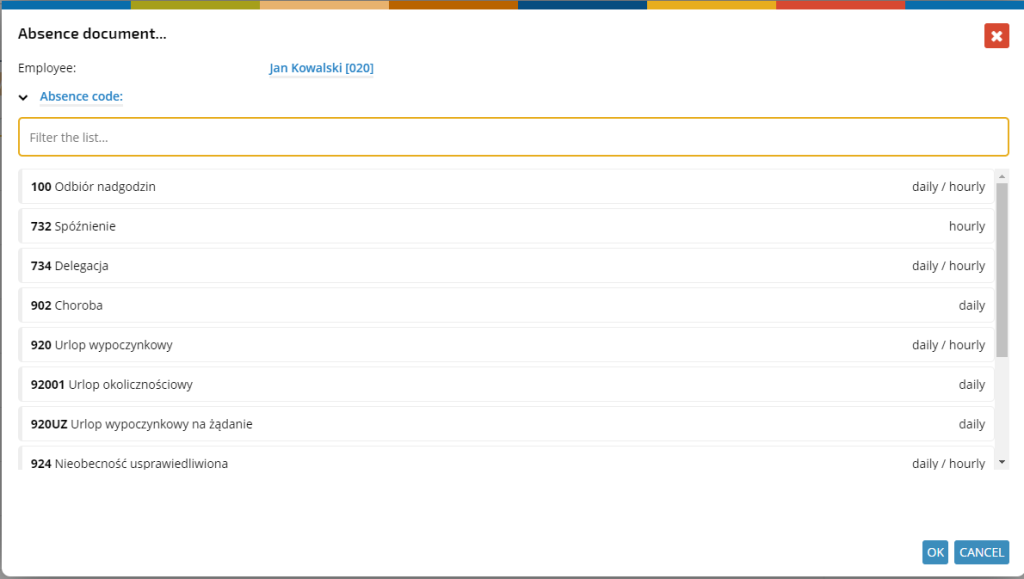
To mark the all-day absence, click on the “gray V icon” icon and select absence.

In the next step, we indicate the appropriate absence code. In this way, we can define an all-day absence with the code 94P.

To remove the erroneously entered all-day absence, in edit mode, hover the mouse over the absence code and click on the X button, according to the photo below.

For hourly absence (hourly underwork), a given day should be classified as working time, modifying the qualified working time accordingly.

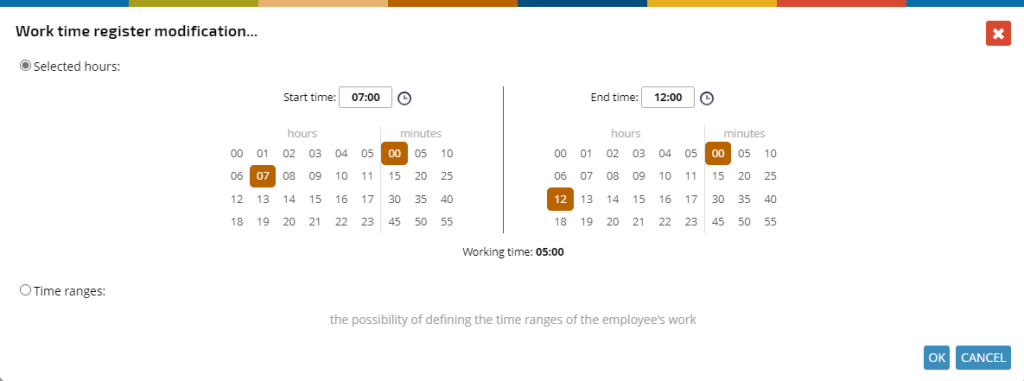

To remove an erroneously introduced hourly absence or to change its duration, the hours of working time would be modified accordingly. If these hours are aligned with the schedule, the absence will be removed.
