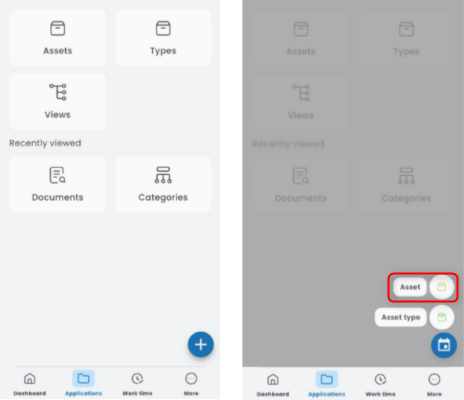
To create an asset, launch the ASSETS application, click the “+” button, and select ASSET.
Select the asset from the list.

Choose the purchase date and the date of adding the asset to the inventory. Enter the registration number.

Select the parent assignment (this can be a category: people, other assets, or contractors) and the asset’s location.

In the DETAILS tab, fill in the fields that were previously added in the asset type. These can be:
single-choice and multi-choice lists

text field

date and time field

numeric field

attachment

Some fields may have additional values that you can enter. Check ADDITIONAL VALUES and select from the list.

In the Costs tab, click the ADD COST button, enter the net amount, select the currency, VAT rate, and the percentage of the cost allocated to the asset. Add a cost description. Costs will be displayed in the summary.

Save the completed document using the floppy disk button.
