The request form is composed of three tabs
Basic data:
The header of the document contains data related to the request, document number, and the circulation status of the request.

Approval path:
On the approval path tab, there is information about the approving person, i.e. the direct supervisor of a higher level to the person submitting the request.

Document Details:
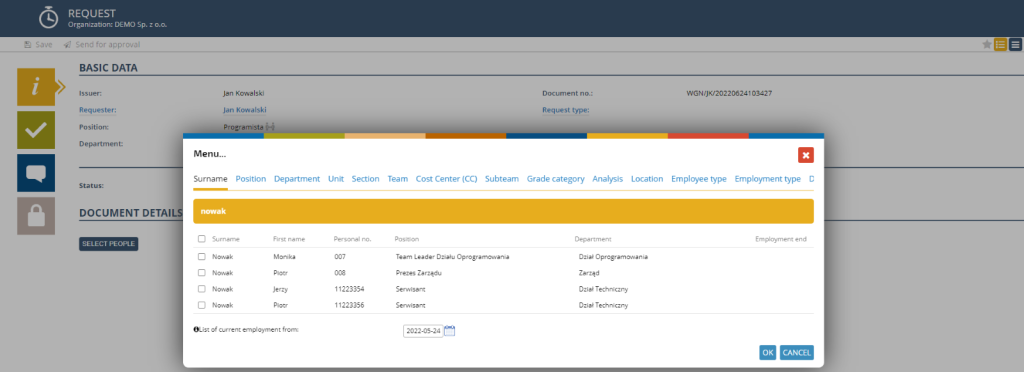
On the Document Details tab, we indicate detailed information about people, dates and the number of overtime hours. To add specific people to the application, click on the SELECT PEOPLE button. In the list, we can indicate a larger group of people by selecting them in the list.

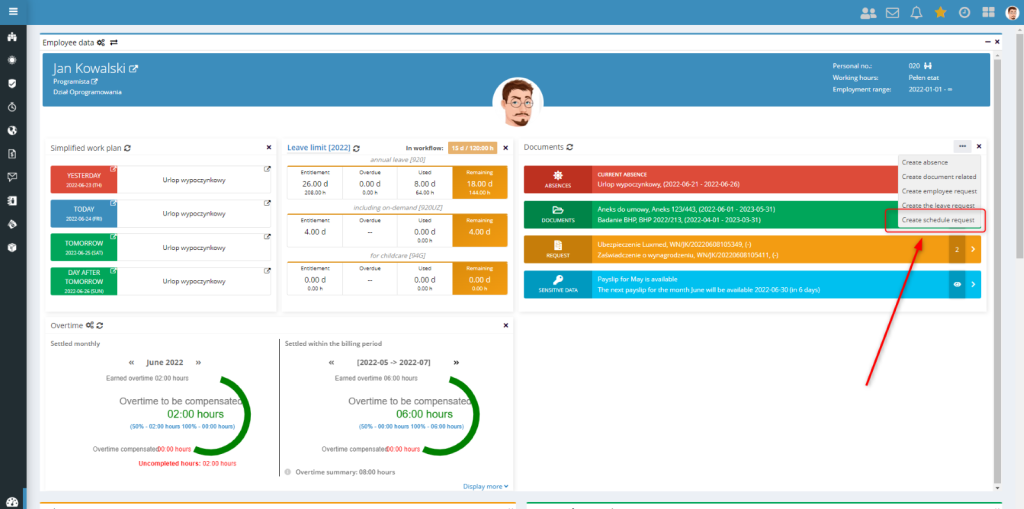
You can create an overtime command in two ways:
– from dashboard user

– from the Applications view in the SCP application
In the next step, we indicate the date range and the appropriate amount of planned overtime.

In the date range section, we can indicate one specific day or time interval in which overtime is to occur.

The amount of overtime can be planned in two ways:
– Indicating the amount of overtime (without specifying the range of hours) and whether it is to be worked out after the end of work or before it begins.


– When indicating specific start and end times of work, then this interval must be “adjacent” to the working hours scheduled on that day.

In the case of a standard rule (one that has a start and end time) in the request, we specify the specific start and end times of overtime according to the photo below. Please note that the selected range of hours must be extreme to the distribution of working time. Therefore, for the working time schedule (T&A) 06:00 – 14:00, the indicated overtime hours must start from 14:00 (e.g. 14:00 – 16:00) or end at the start time, i.e. 06:00 (e.g. 05:00 – 06:00).

In the case of the so-called fork rule (which does not have a strictly defined start or end time, but only the duration), we only give the length of overtime, without indicating specific hours of their occurrence.

To modify the specific start and end times of overtime, we click on a specific record and re-indicate the relevant hours or the amount of overtime itself.

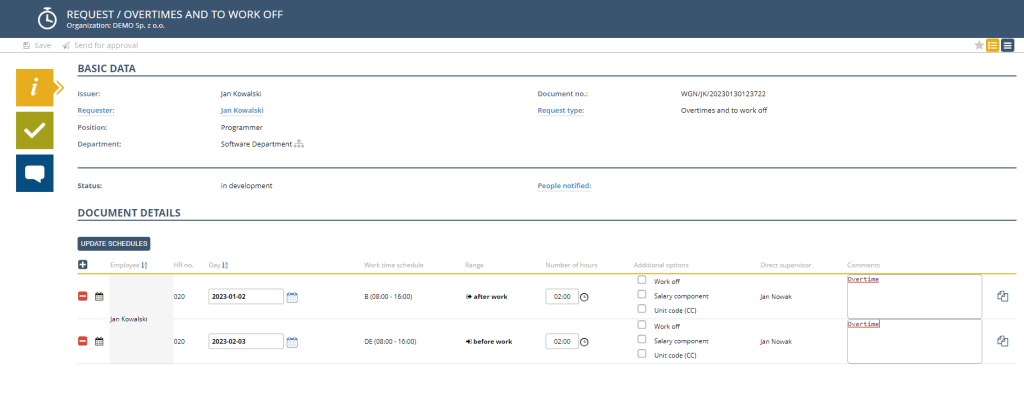
After completing all the necessary data, the details of the application are as follows.

The data contained in the table can be sorted by Employee or by the date of overtime, to sort the data, click on the icon in the table header.

The data sorted by date looks like this.

You can add an appropriate note or comment to each row by typing it into the Notes column.

After completing all the necessary data, we send a request for approval by the senior supervisor. To do this, click on the button located on the button bar.

The approver receives an email informing them of the request in question.

