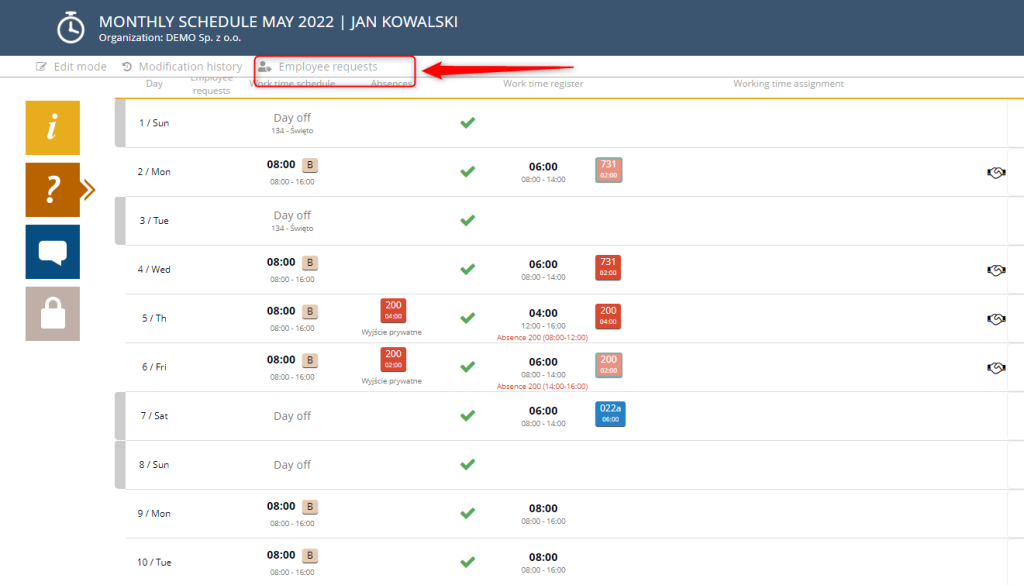
To register an employee request, just log in to the SSC Master system and open the schedule document for a given month. On the navigation bar, select the button ![]() .
.
After selecting the button, a table opens and you can define your availability for the entire given month. With the “+” button you can add more rows to the table if needed.
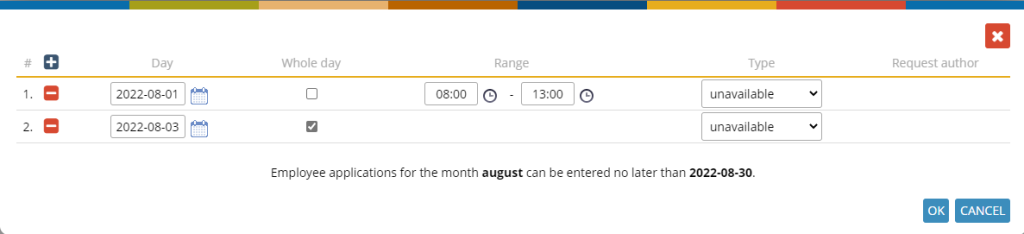
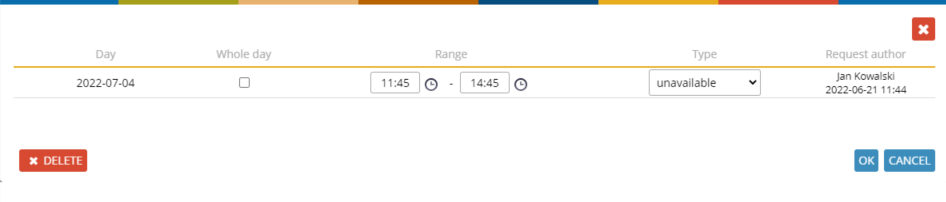
In the following columns of the table, you need to input the data:
Day –defines the date for which you want to report your future unavailability,
The whole day – to be marked if you want to signalize your unavailability for the entire indicated day,
Scope – input the hourly range if you want to define your unavailability in terms of hours,
Type – indicates the type of availability, by default it is NOT AVAILABLE with the possibility of changing to AVAILABLE.
Note: If you want to input your unavailability periods in two hourly ranges during the day, e.g. from 08:00 – 10:00 and 18:00 – 20:00, just mark the type as AVAILABLE and specify the availability range, i.e. 10:00 – 18:00 as at the screen below.
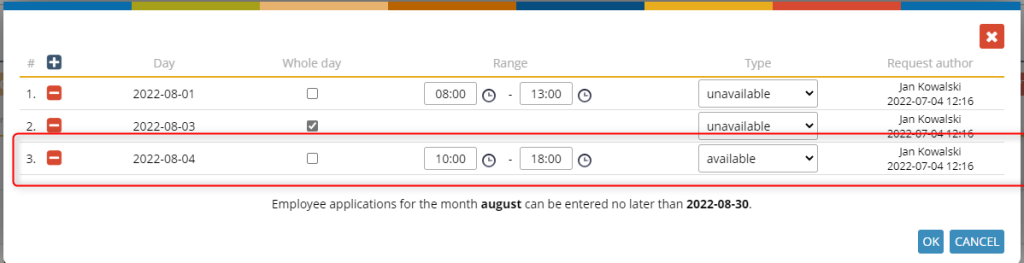
In such a case, all hours outside the indicated availability range are automatically treaten as unavailable.

Employee requests entered for a given day are displayed in each row and are indicated by appropriate icons.
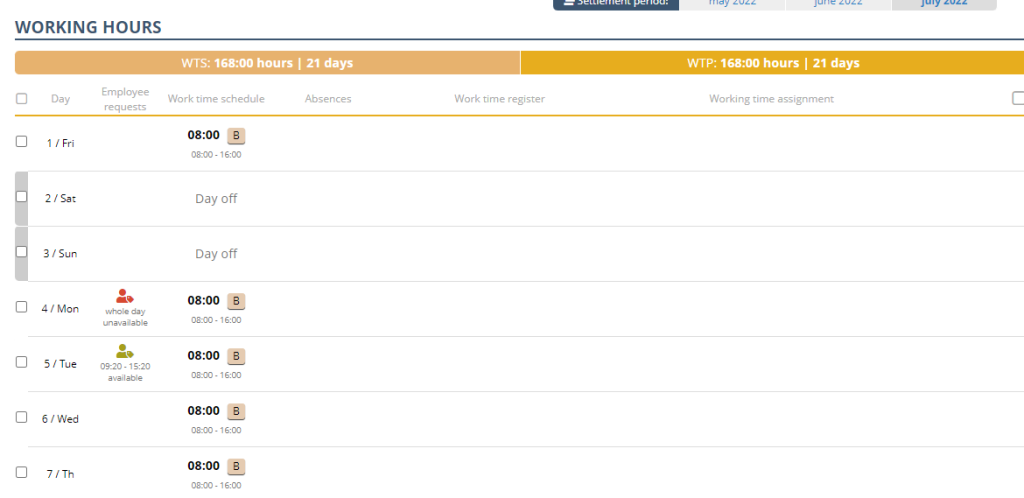
Employee requests can be entered “one at a time” each day – just indicate a specific line in the schedule and click on the “+” icon.
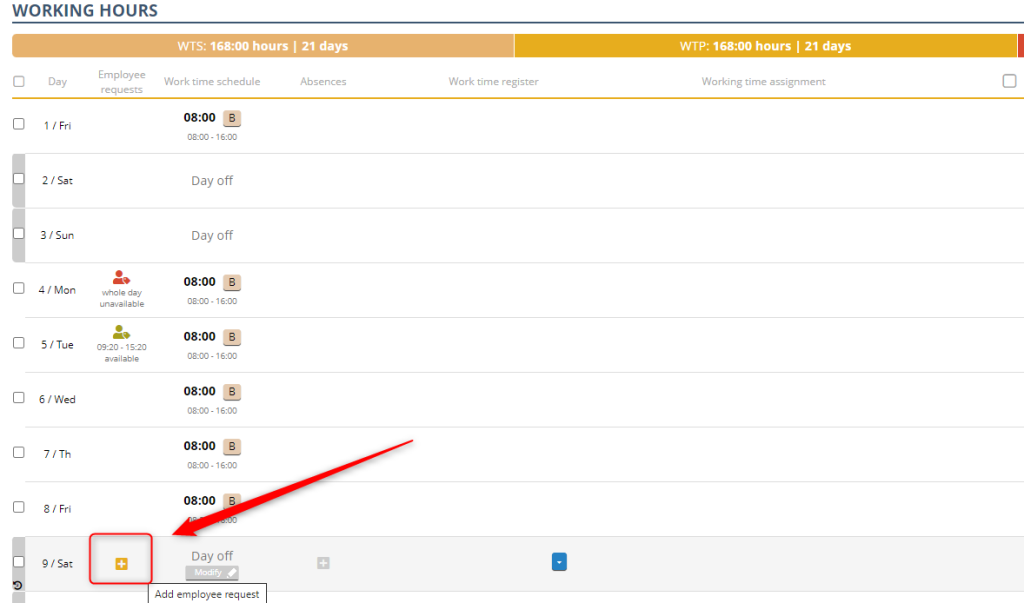
Doing that just defines your availability only for a specific day:
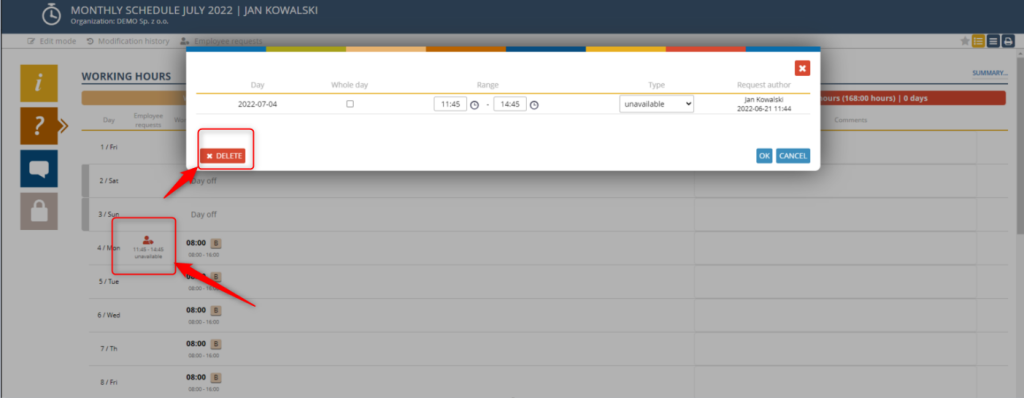
The removal of the introduced availability, as well as its submission, can be done in two ways:
– From a specific day level
Click on the icon informing about the entered employee request and then select the Delete button.
– From the employee requests summary table level
Click on the icon![]() located on the button bar and remove a specific row from the table.
located on the button bar and remove a specific row from the table.